Showing posts with label WEDDING DIY. Show all posts

July 17, 2008

I think I'm in L-O-V-E...with a cake topper.

The journey to our cake topper has been a long one, a long road strewn with sparkles and satin.


Originally, if you remember, I lusted over Ann Wood's birds, then decided to make deer cake toppers. However, as cute as my deer cake toppers were, there weren't any deer anywhere else in our wedding, and Mr. Shortcake and I had little inclination to redesign our wedding around them. So, ix-nay on the ambi-bays, and back to the forest they went.


Back at my (very pink) drawing board, surrounded by the usual flying birds and chattering chipmunks, I got to work on what has turned out to be the most satisfying DIY projects OF MY ENTIRE LIFE.


*CUE ALAN MENKEN*


I've been dreaming of a bit of lace


and a delicately painted face


that's what makes my heart begin to patter


People tell me that I shouldn't care


Buy a cake topper from anywhere


but I'm glad to say I did decline


and made my true love...


....my something-old and new love...


....may I present my true love,


isn't it divine?


I really tried to create an accurate likeness of our furbaby, Harvey... except I painted him at his crazy-excited-face finest! :)


What do you think? Does my paper maché topper pass the test? :D


July 2, 2008

SHORTIE DIYS: Gifts for the Bridal Posse

For me, like for many brides, there was definitely a temptation to go too far on bridesmaid gifts.  But, as Mr. Shortcake succinctly noted,

"You're thanking them for being bridesmaids - not paying them."

Wise man, that one.  I should marry him. :) Nevertheless, My bridesmaids are still receiving quite the haul:


Each bridal posse member will receive:

  • a petal-pink pashmina shawl to coordinate with their dresses and keep their necks warm throughout the winter
  • a monogrammed set of  polka-dotted note cards
  • a monogrammed polka dot tin (which will hold earrings)
  • the above-mentioned freshwater pearl earrings I made a while back
  • a monogrammed magnetic polka-dotted note pad
  • a handmade ipod holder (containing a freshwater pearl necklace I bought in Hawaii - not an ipod :D) ...each ipod holder (and lining) was made to match the colour scheme of the "monogrammed" pieces, and closes with a ribbon and vintage button closure!

I'm really pleased with how they turned out !

(P.S. Ignore the plastic wrap - that was for their journey to BC via WestJet - I didn't want my davines  all over them!):

 For Mr. Shortcake's sister:


For Youngest Sister Shortcake - a dinosaur holder because she always says "raaappptorr"  at the most inappropriate moments (aren't family in-jokes so WEIRD?)


For Sister Shortcake, my MOH - a shark, for her all-time favorite animal (since she was a toddler - MY FAMILY IS SO WEIRD :) )


Then I wrapped them all up according to gift recipient (aqua and magenta for MOH, green and petal for bridesmaids ), and made sure to write their name discreetly on the bottom of the bag for quick identification at our rehearsal dinner.


All ready for unwrapping! (The tissue pomanders were left over from my amazing bridal shower - more on that later)

I put a lot of time and effort into their gifts, so I really, really hope my bridesmaids enjoy them.

I would have loved to give them each, say, a Mercedes and a trip to the Dominican Republic, but Mr. Shortcake put his foot down and said that we're only giving away tropical trips to people for Christmas this year. ;)

Did anyone else DIY  part of their bridesmaid gifts?

April 15, 2008

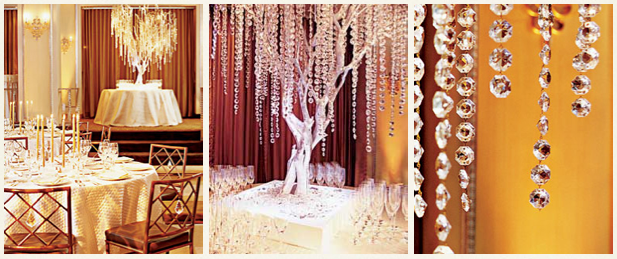
Is That Birch Tree? No, It's a Bling Tree!


Heads up, Miss Flamingo (and anyone else making crystal trees)!

I just found some great tutorials on how to DIY, check it out here and here!


Crystal trees look smashing as centerpieces, as wish trees, or as accents on food stations. We're not making full trees, but crystal strands mixed in with floral arrangements can look mighty fancy as well!


Have you found any stellar sources of crystals? Do share!


April 10, 2008

Fit to Be Tied: MSW Spring 08

I was delighted when I opened the new spring issue of Martha Stewart Weddings.


Not only


A) Did I finally have my grubby little paws on a copy


B) Did she have whole spread on a 1950s vintage wedding in " A Return to Glamour"


C) Did my new colour palette appear every where in the magazine (ballet pink, white, buttercream yellow, mustard, grey, charcoal, tiffany green)


D) She had a whole article about ribbons!


Ribbons are beautiful, silky creatures. I like ribbons. I love ribbons. I love ribbons almost as much as Miss Lovebug does, although I haven't entered a 12 step program for my addiction yet.


Yet.


Bridesmaid's Bouquet wraps?


from: http://www.marthastewart.com/portal/site/mslo/menuitem.3a0656639de62ad593598e10d373a0a0/?vgnextoid=46913ab75a6b3110VgnVCM1000003d370a0aRCRD&autonomy_kw=ribbon&rsc=header_18

Ribbon.


Seating chart?


Ribbon.

Charm Cake for the Bridal Shower?
(from Martha Stewart)
Ribbon.

Bride's bouquet wrap?

(from Martha Stewart)
(Love-knotted) Ribbon.

Invitation wrap?

Technically a secret, but I think you can guess. =)


Garter-in-progress?

Ribbon.

Embellishment for whatever shoes I get?


(blue print image)
Ribbon.


Headbands for the junior bridesmaids?
So, umm, yeah, there will be a LOT of ribbon at our wedding...and yet, I feel the need for more :)
How are you using ribbons?

April 1, 2008

I Love Me Some Colours: Re-painting for Portraits

What a fabulous idea!


(Photograph by Mel Barlow )


Sasha and Abel had their wedding portraits taken in front of a wall in Sasha's old bedroom that had been painted turqouise specifically for the wedding!


I know my mother would be game as she changes the wall colours along with the seasons - and I LOVE the freedom in choosing your backdrop colour (incorporating wedding scheme, anyone? :) )


What colour would you choose?


**Thanks to Faye and Greer for bringing this to my attention, and to Social Brides for bringing it to theirs!


February 6, 2008

a shortcake DIY: Bead- DAZZLING!

Because there is seriously nothing to do in Winnipeg in the winter (FYI I'm out here till 2009 for Mr. Shortcake's masters degree), I have taken to crafting. A LOT. I've always been addicted to my glue-gun, but now that I have a wedding to plan for, it's becoming necessary to branch out into new creative fields.


For example, the last time I went to Oahu, I bought my bridesmaids each these lovely freshwater pearl necklaces, to go with whatever dress I eventually picked out.


However, I neglected to pick up any matching earrings, figuring that it would be easy to match their colour and irregularity cheaply back on the mainland. Nope.


Enter...my $10 "Dream" beading kit from Walmart!


With this kit, I was able to make matching earrings for all of my bridesmaids - and for less than $5 each pair!


 FRESH-WATER PEARL DROP EARRINGS


  • tiger tail jewellry wire

  • fresh water pearls (or stones/jems of your choice)

  • fish-hook earring backs

  • crimps

  • round-nose pliers

  • wire-cutters


1. Collect the beads/semi-precious stones/pearls that you would like to use. You can get these at the big Walmart, or Michael's, or even online for rarer or bulk items. You will also need fish-hook earring backs, "crimps" (small metal spacer beads you press), and jewellry wire.


2. Assemble your instruments. Round-nosed pliers? Wire cutters? Check!


3. Determine how long you would like your earrings to be - double that, and cut with a pair of heavy duty wire cutters. The wire I used was "tiger tail jewellry wire" - very soft and fine, but incredibly strong.


4. Pass the wire through the loop at the end of a fish hook earring back. Make sure the loop is completely closed, use your round nose pliers to make this loop tighter, if necessary. Ensure that the wire is folded exactly in half, bend and press firmly with your pliers so that the wire retains that shape.


5. Pull a "crimp" up over the two ends of the wire, all the way up to the fish hook loop junction. PRESS the crimp closed with your pliers. This 'squashing' locks it into place.


6. Pull your first bead/stone/pearl up and over the two ends of the wire. I used a small freshwater pearl.


7. Pull a crimp up and over the two wires, position it just below where you want your bead to rest, and then press/squash it into place.


8. Pull another bead/stone/pearl up and over the two ends of the wire, position as desired, pull a crimp up and over the two ends of wire, and squash into place beneath the bead/stone/pearl.


9. Use your wire cutters to cut off the two wire ends directly beneath the last crimp. If you've "crimped" correctly, it will stay in place, and you have nothing to worry about!


10. Repeat steps 1-9 for the other earring. Et Voila! C'est Magnifique!


How cute are these? And, I think, totally wearable again.


So, for the crafty at heart, these simple earrings are definitely quick and easy impact pieces. You can change the number/type of beads used, or even make multiple strand earrings by pulling the beads and crimps over only one wire at a time, and leaving the two ends uneven in length. These earring are great as BM gifts, MIL gifts, or even just as a lovely pick-me-up for yourself. I will warn you though - the beading aisle at Michael's can be a dangerous place to go with a paycheck! :)